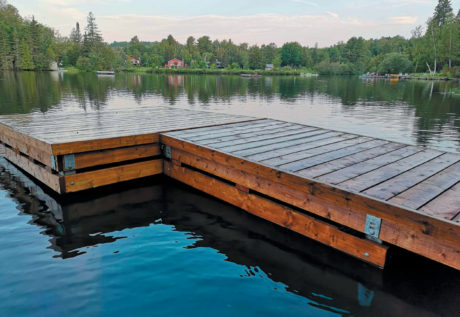
How to build a floating wooden dock

Before starting
These examples are meant to guide you as best as possible in planning your project. But some regions may require more anchors or a different method; we cannot list everything here. We cannot be held responsible for any incidents or damages that may occur as a result of using the techniques presented on our website or in our documents. These drawings, plans and/or technical points are only general information and can never replace, in whole or in part, certified engineering drawings.
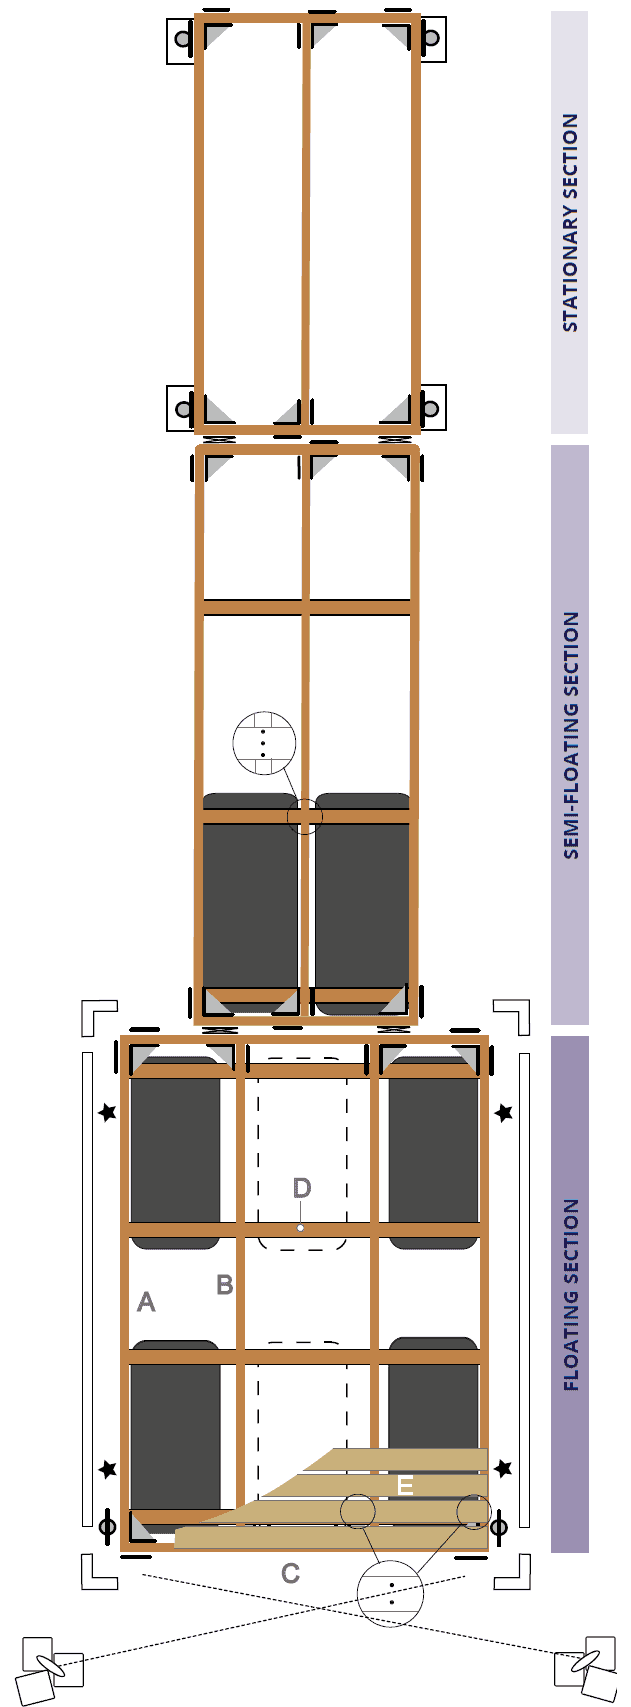
How to build a typical 3 section dock
- Fixed section of 4′ x 8′
- Semi-floating section of 4′ x 12′ (or 4′ x 16′)
- Floating section of 8′ x 12′ (or 8′ x 16′)
Materials list
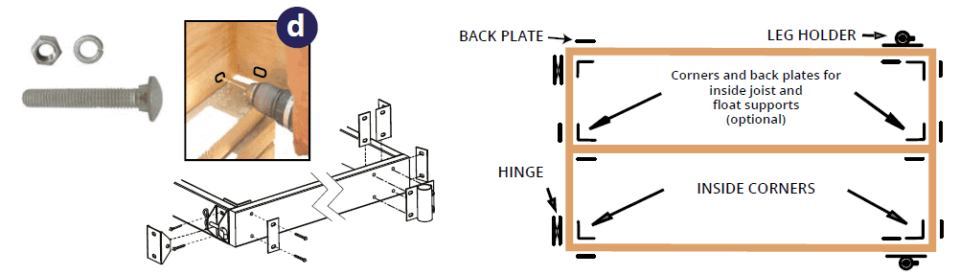
- Hot dipped galvanized steel hardware
- Foamed or empty floats in several sizes
- Side pieces
- Inside joists
- End pieces
- Float supports
- Decking boards
Additional accessories
- Dock bumpers and boat fenders
- Mooring cleats and mooring lines
- Swimming ladders
- And more!
Build a wooden dock in 4 steps
Step 1
For a floating dock, start assembling the dock with the bottom side up so you can easily install the floats in step 3. Lay out the stringers and ends of the base structure (and inner braces if applicable) and screw in place.
- The screws should not line up with the holes you will be making for the hardware.
- Check for squareness by measuring the 2 diagonals. They should be within ⅛” of each other in length.
- Secure in position by temporarily screwing a board to the structure.

Step 2
- Starting with the corners, place the pieces and mark the holes with a pencil. Drill and install the hardware with the bolts. Note that the parts may vary from the drawing. For a fixed dock, continue with step 4-B.
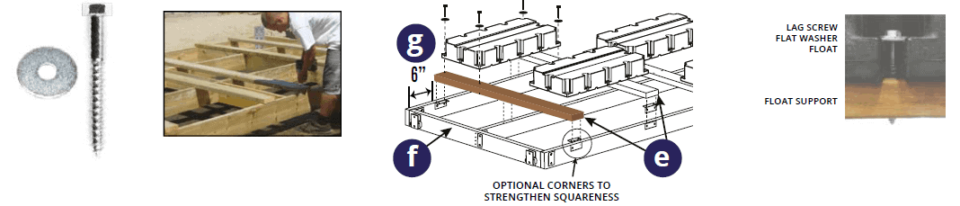
Step 3
Lay out the float supports (2″ x 6″ boards) E and the floats on the structure F to determine their positions. Leave +/- 6″ spacing with the main structure to facilitate further handling G. Mark the locations of the float brackets on the structure and the floats on the brackets. Remove the floats, screw in the brackets and secure the floats with lag bolts and large flat washers. You can also use bolts with lock washers and flat washers.
Step 4
- For a floating dock, before installing the decking, you will need help to carefully turn the structure right side up without injuring yourself.
- Recheck the squareness (see step 1). Screw in the decking starting at one end of the dock section and adjusting the width of the second to last board to fit the remaining space. Screw them into the outer and inner rails H.

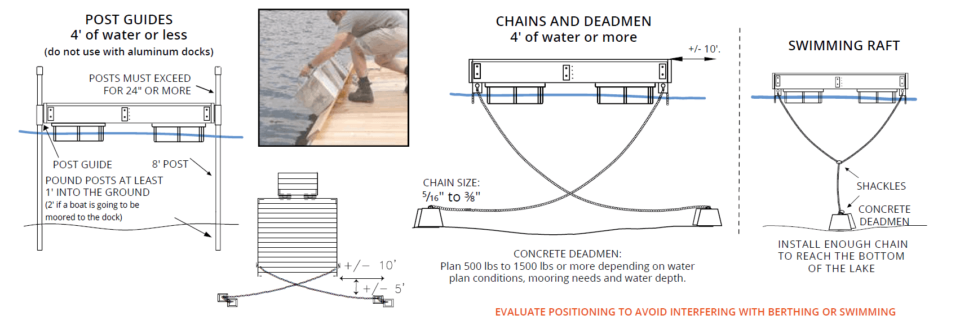
How to anchor a dock (on piles or floating)
Dock on piles
It is not necessary to anchor a fixed dock unless it is in a basin with high waves. Piles driven into the ground provide stability. You should, however, anchor your boat so that it cannot hit the docks. Some people prefer to install a boat elevator. In difficult conditions, you can add one or more diagonal braces between the piles.
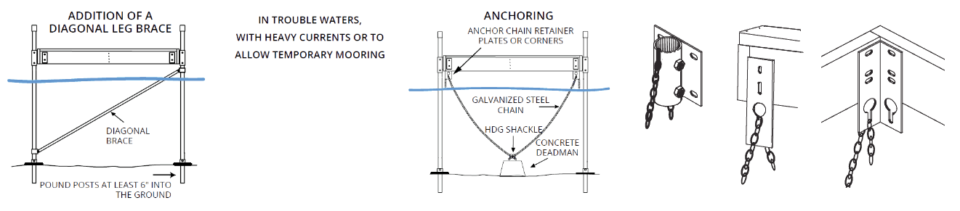
Floating docks
A floating dock system absolutely requires an anchoring system at the end of the dock and every ~30 feet.
It is the anchor blocks that will hold the docks in place through waves and water movement as there are no piles. Chain ties are required at each anchor point.
To install the anchor weights, place them on the floating dock section (we suggest you put a thick cardboard or piece of wood under the blocks to protect your decking), group the appropriate amount of blocks for each corner. The chain will then be attached with a shackle to the group of blocks required for each corner.
Move the dock over the desired anchor area and then tip the blocks into the water while holding the end of the chain that will attach to the dock. Keep some tension on the chain, hang it in the opposite corner and then cut it off, saving 2 extra feet for in-season adjustments.
Do the same steps on the opposite side.